

All quilters develop their own shortcuts, or tricks or have favourite tools to help when they are creating.
When I started getting busy and accumulating so many UFOs in my To Be Quilted pile, I just started putting the flimsies in a bin. A few months ago I was at the studio and pulled out a flimsy from one of the bins to put it on the longarm. Once I had it pressed I went back to the bin to get the backing fabric. Can you guess? Right, it wasn’t there.
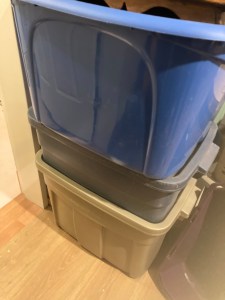
I stopped what I was doing and pulled out my bins of flimsies. I took everything out of the bins and double checked that each flimsy had its backing fabric and binding folded inside the quilt top. Any that didn’t have them were put aside to get that problem sorted out. There were also a couple of flimsies that I thought I might make larger. They had the coordinating border fabrics tucked inside the tops in case I did decide to enlarge them.
As each quilt went back in the bin it now has everything needed to finish it except the thread. Luckily I had taken a bin of backing fabrics with me to the studio that trip.
I’ve learned that organization is the one thing I need to focus on with having my longarm so far from home. Now when I do get to spend time at the studio, all I have to do is decide which quilt to finish and give everything a good press and I’m good to go. 😉
Once I have the binding hand sewn on the quilt, I trim my leftovers and have a special storage for them. It works well to know where those leftovers are if I just need a small binding or choose to make a scrappy binding. I’ve also been known to take out bindings to trim down if it was the “perfect” fabric for a few needed 2 1/2” squares. 😄

My other tip came about when I was marking a quilting design on a quilt. I used some of the water soluble markers. After I finished it on the longarm, I tried to get rid of the marks. They didn’t come out. It took water, heat and then once I had the binding on the top, several trips through the washing machine to get the marking out.
I’ve now gone back to my tried and true methods for planning a quilt design. I use the chalk markers but often have to redraw the design. My absolute favourite tip is the funniest. You know those little slivers of hand soap when your bars are almost done? They make the best quilt markers ever. You can wipe it off with a damp cloth but it stays longer than chalk. If any of the soap gets left on it comes out the first time you wash the quilt and doesn’t leave any residue or marks.


Thanks for spending some time with me. I enjoy reading and responding to your comments. 😄. Carol
Linking with Kathleen McMusing @ Tips and Tutorials on the 22nd

I tried water soluble markers too, and didn’t have much success. Now I either use chalk or my hera marker. Fun tips to read. I like that little tin for your bindings!
LikeLiked by 1 person
Hi Wendy. I use chalk and my Hera markers, too. Isn’t the tine cute. It was a gift from my daughter 😉
LikeLiked by 1 person
Yes, organization is key especially since you travel to quilt. I hang my flimsies with the backing and binding. And yes, soapbslivers are great markers!
LikeLiked by 1 person
Thank you. If I didn’t travel to longarm I too, would hang everything. It’s taken me forever to get this organized but it works now 😉
LikeLiked by 1 person
These are great tips, Carol. Sometimes the best laid plans, but at least for the next time you know you have what you need! Thanks for linking up to #TTot22 Party!
LikeLiked by 1 person
Thank you Kathleen for the comment and for hosting such a fun linky party. 😄
LikeLike
You are SEW organized, Carol!! With your studio so far from home you really DO have to be. Thanks for the reminder about soap as a marking tool!
LikeLiked by 1 person
Thank you Joy! Being organized is the only way I can get anything done these days! 😄
LikeLike
Great tip! I’ll have to try using soap! 🙂
LikeLiked by 1 person
Thank you.
LikeLike